Your child is ready for another backyard drive, but the Power Wheels vehicle will not run. Before buying a replacement battery, check the battery, charger and connections using the instructions for that model.
A multimeter can provide an initial voltage reading. It cannot, by itself, prove that a battery still has enough capacity to power the vehicle.

This guide covers an adult checking a standard 6V or 12V Power Wheels battery. It does not cover modified vehicles, lithium conversions or charger repairs.
How to test a power wheels battery
Start with the vehicle and battery manuals. A vehicle that will not run may have a discharged battery, a charger problem, a loose connection or another fault.
Check Your Battery with a Voltmeter
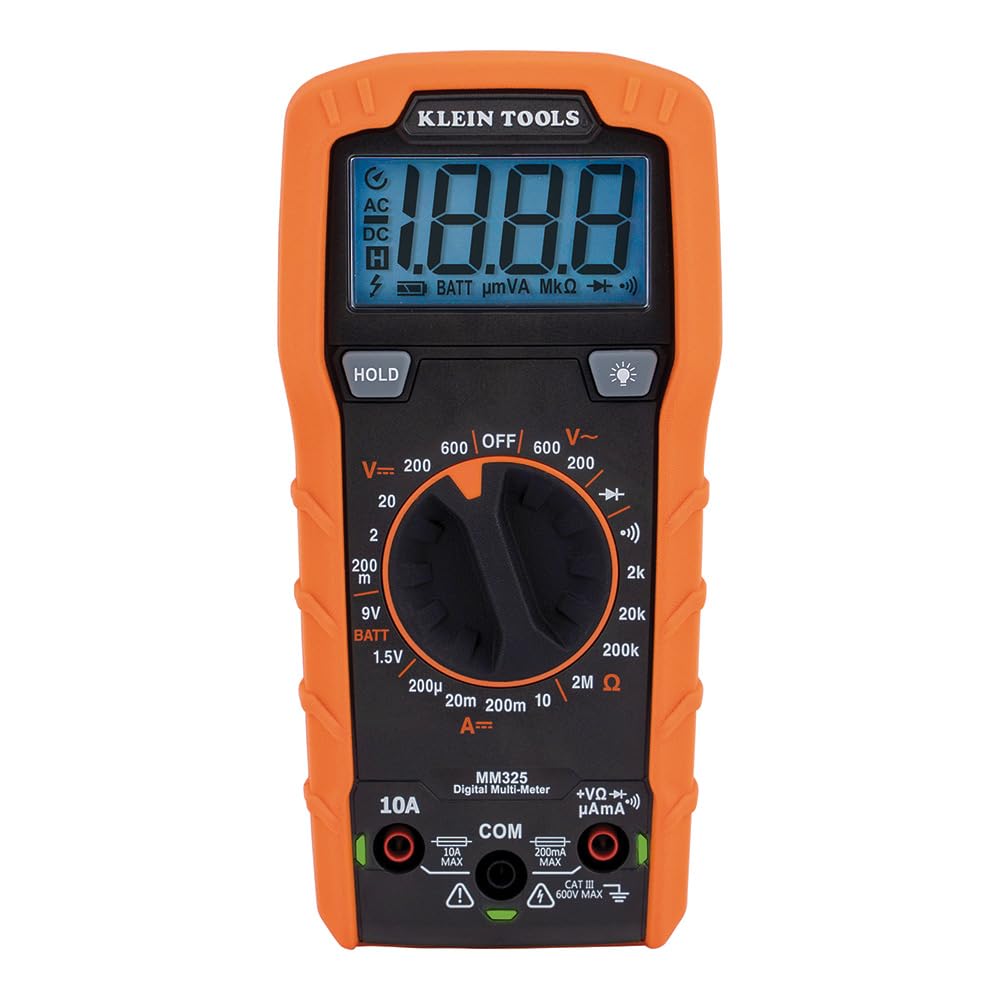
Use a digital multimeter with a suitable DC voltage range and intact test leads. The Klein Tools MM325 below can make this measurement; it includes the meter, test leads, batteries and instructions.
Klein Tools MM325 Digital Multimeter
- Manual-ranging meter for an initial DC voltage check
- Includes test leads, two AAA batteries and instructions
- Single multimeter; not a charger or a traction-battery capacity tester
Its dedicated 1.5V and 9V battery-test settings are not the settings for a 6V or 12V Power Wheels battery. Use DC voltage mode for the check described here.
Preliminary steps:
Inspect the battery, charger and connectors before charging. Do not use or charge a damaged or leaking battery. Charge an undamaged battery only with the charger approved for its exact model, for the time specified in its manual.
There is no universal eight-hour charging rule. First-use, routine and storage charging instructions can differ. A matching voltage label alone does not establish charger compatibility.
What to keep in mind:
A voltage reading is a troubleshooting clue, not a pass/fail capacity test. Do not declare a battery healthy solely because it reaches 12.6V, or beyond recovery solely because it is below 11.8V.
Record the result and the charging history for the service technician. If the vehicle still stops or runs only briefly, further diagnosis is needed even when the unloaded voltage looks plausible.
Safety precautions:
Battery handling and testing are adult tasks. Keep children away. Do not open a sealed battery, bridge its terminals, force probes into a connector or bypass a fuse. Stop if the terminals cannot be identified and reached without damaging the connector.
Work in a dry location. Inspect the meter and leads, and verify operation on a known voltage as instructed by Klein. Keep fingers behind the probe guards.
Procedure for testing a power wheels battery
For an initial disconnected voltage reading:
- Turn the vehicle off. Disconnect the battery from the charger and vehicle according to the vehicle manual. Identify the marked positive and negative contacts.
- On the MM325, insert the black lead in COM and the red lead in VΩ. Select DC voltage (V⎓), not current, resistance, continuity or battery-test mode. Do not use the 10A socket for this check.
- Follow the MM325 manual: begin at the highest DC voltage range, then reduce the range for a clearer reading. Its 20V DC range covers a nominal 6V or 12V battery when the measured voltage is below 20V.
- Touch the red probe to the positive contact and the black probe to the negative contact without bridging contacts. Read and record the voltage, then remove the probes.
A minus sign