
Some exhaust leaks can be repaired without welding, but the method depends on the damage. A suitable exhaust sealer or repair wrap may address a small leak in otherwise sound metal. A separated pipe, failed hanger or heavily rusted section needs proper mechanical repair or replacement, not a coating over the damage.
The exhaust manifold collects engine gases, the catalytic converter treats emissions, and the muffler reduces noise. Pipes and joints carry those gases toward the outlet. A leak anywhere along that route needs attention; a quiet tailpipe does not prove the rest of the system is sealed.

Inspect the Exhaust Before Choosing a Repair
Park on firm, level ground, stop the engine and let the exhaust cool completely. If access underneath is needed, use the vehicle maker’s lifting points and properly rated stands or ramps. Never work under a vehicle supported only by a jack.
With the engine off, look for soot marks, cracks, loose joints, missing hangers, corroded flanges and damaged flex pipe. Walker’s exhaust inspection guide explains why the entire system should be examined rather than patching only the first visible hole.
Do not search for a running leak with your bare hand, block the tailpipe or ask someone to rev the engine while you are underneath. If the source is unclear, an exhaust shop can check it with appropriate diagnostic equipment. Exhaust entering the cabin, a hanging pipe or major corrosion calls for repair before further driving.
Prepare a Sound Surface
Wear eye protection and suitable gloves. Remove loose rust and contamination without thinning already fragile metal. Stop if brushing or sanding opens a larger area of corrosion: there may not be enough sound material to support a patch.
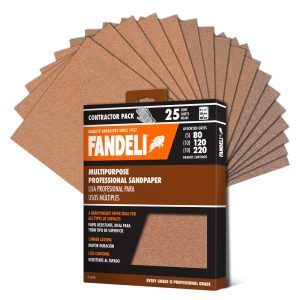
FANDELI Assorted Sandpaper
- Assorted 80, 120 and 220 grit sandpaper
- For surface preparation appropriate to the selected repair product
- Use on a cold exhaust; do not sand through weakened metal
Follow the cleaner and repair product’s directions. Cosmetic nail-polish remover is not a substitute for a specified workshop cleaner. Let any permitted flammable cleaner evaporate completely before applying heat or starting the engine.

How to Fix an Exhaust Pipe Without Welding
1. Use a Product Intended for Exhaust Leaks
Choose an exhaust-rated sealer with instructions that cover the actual location and damage. A temperature rating alone does not make household epoxy, hot glue or ordinary gasket silicone suitable for repairing an exhaust pipe.
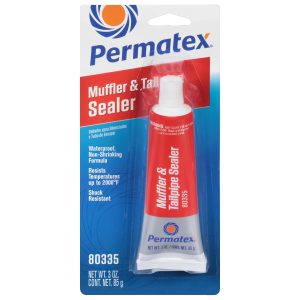
Permatex 80335 Muffler and Tailpipe Sealer
- 3 oz. tube of exhaust repair paste
- For holes and leaks in mufflers, tailpipes and joints
- Manufacturer-rated temperature resistance up to 2000°F
- Surface preparation and curing instructions must be followed
Permatex 80335 is a sodium-silicate paste, not a two-part epoxy. Its technical sheet calls for a clean surface, wetting with water and application over the hole. It specifies an initial 30-minute drying period followed by 10 minutes of engine running; full cure takes longer and depends on drying and heat. Read the current package and manufacturer’s technical sheet before use.
If the directions call for running the engine, do so outdoors after moving clear of the vehicle. An initial set time is not a guarantee that every repair is ready for normal driving. Do not use paste to hold separated pipe sections together or to restore missing metal over a large rusted area.
2. Use an Exhaust Repair Wrap Where Its Instructions Permit
An exhaust repair bandage or wrap is different from ordinary tape. Check its temperature limit, permitted damage size, required overlap and curing method. It needs enough sound pipe on each side to remain supported; do not improvise the wrap thickness or substitute household foil and hose clamps.
Application varies by product. Some wraps use a resin and a securing strip; others require water or heat. Follow the specific instructions rather than applying one brand’s preparation or cure time to another.

3. Replace a Damaged Section or Repair a Joint Mechanically
A correctly sized replacement section, gasket, sleeve or exhaust clamp can provide a repair without welding when the vehicle’s exhaust design permits it. Match pipe diameter, joint type, alignment and the required fastening method. A hose clamp is not a universal replacement for an exhaust clamp or hanger.
If the pipe is rusted through extensively, separated, crushed or unsupported, replace the failed parts. Keep the correct hangers and clearances from the body, wiring and fuel or brake lines. Choose catalytic converters and mufflers by the exact vehicle application rather than appearance or a generic product listing.
Our guide to metal-cutting tools covers tool types, but cutting an installed exhaust requires suitable access and protection for adjacent parts. Where welding is needed, outdoor welding equipment is general background; a workshop should select the right process for the thin exhaust material.
Symptoms That Need Investigation
- A new ticking, blowing or unusually loud exhaust sound can indicate a leak.
- Visible cracks, soot around a joint or a sagging pipe need inspection.
- Fuel economy, power loss or a warning light can have several causes; those symptoms do not identify an exhaust leak by themselves.
- Exhaust smell in the cabin warrants prompt attention. Do not rely on smell alone to detect every hazardous gas.

Repair the cause rather than covering a symptom. A missing hanger can let the exhaust move and reopen a joint. After the prescribed cure or installation procedure, check the repair and its supports; persistent noise, leakage or movement means it needs further work.
Repair Demonstration
The following ChrisFix demonstration shows exhaust putty repair. It is not a review of the Permatex product above; use the directions for your exact product and inspect the pipe’s condition before choosing a repair.

FAQs on Fixing an Exhaust Pipe
How do you fix a loose exhaust pipe?
Identify whether the fault is a failed hanger, clamp, flange or damaged pipe. Replace the failed parts with suitable exhaust components and restore correct alignment and clearance. Do not suspend the system with improvised hose clamps.
Can I fix my exhaust myself?
A small, accessible leak in sound metal may suit an exhaust repair product used according to its instructions. Extensive corrosion, a separated pipe, damaged flex joint or uncertain vehicle fit is better handled by an exhaust specialist.
Can I drive my car with a broken exhaust pipe?
Do not assume it is safe. Exhaust entering the cabin, a hanging pipe or a major leak needs repair before further driving. Arrange inspection or recovery when necessary rather than relying on a temporary patch.
More DIY guides can help with planning. For an exhaust repair, the decision between sealing and replacement starts with the condition of the metal and the vehicle’s required components.